One of the crucial steps to making your event a success is allowing people to register for it online.
Having your event online allows you to promote it easily across social channels, encourages your attendees to share with their friends, and makes it really easy for people to sign up and pay to attend your event.
It also makes it much easier (and less time consuming) for you to manage the logistics of the event, allowing you to replace the complex excel spreadsheet (or pen and paper), and let technology do the hard work for you.
On the day you can just print out a guest list (or manage it digitally through your phone or tablet), understand where your ticket sales came from, and then sync up your data so that everything stays in one place.
But how do you set up an event online? We take you through 8 simple steps to set up online registration for your event.
Step one: Know your audience and your goals
Before you actually get your event online, there are a couple of really important questions you should consider that will make everything else easier.
Who is the event for? And why are you running it? These two questions will form the basis of your event plan (click for a guide to creating an event business strategy).
Knowing the answers will also really help you in correctly setting up your event online, from getting the design and copy right, through to pricing tickets and choosing which channels to use for promotion.
Once you’re confident on these questions, it’s time to dive into the online setup.
Step two: Choose an online ticketing and registration provider
The next step you need to take it to choose the right online ticketing and registration partner for you to work with. There are a number of questions you’ll need to consider in order to pick the right one, including:
- How easy is it to purchase tickets through the site (including on mobile)
- How easy is it for you to access the system and make edits to your event set-up
- Who owns the data from your attendees and how is it protected?
- How robust is the analytics and how easy it for you to see what is working (and what isn’t) for your event?
- How easy is it for you and your attendees to promote the event online?
- What on site tools and functionality does it have?
- Is there 24/7 support to help you when you need it?
We have a full guide with more detailed questions and functionality to consider when selecting your ticketing partner, which you can download here.
Step three: Create your account
Next up, you’ll need to create an account with your chosen ticketing provider.
With Eventbrite this couldn’t be easier. Simply add your email and a password, and you’ll be ready to go to the next step in seconds. In fact, why not test it out now and go through the rest of the steps in real time!
Step four: Add the basic details
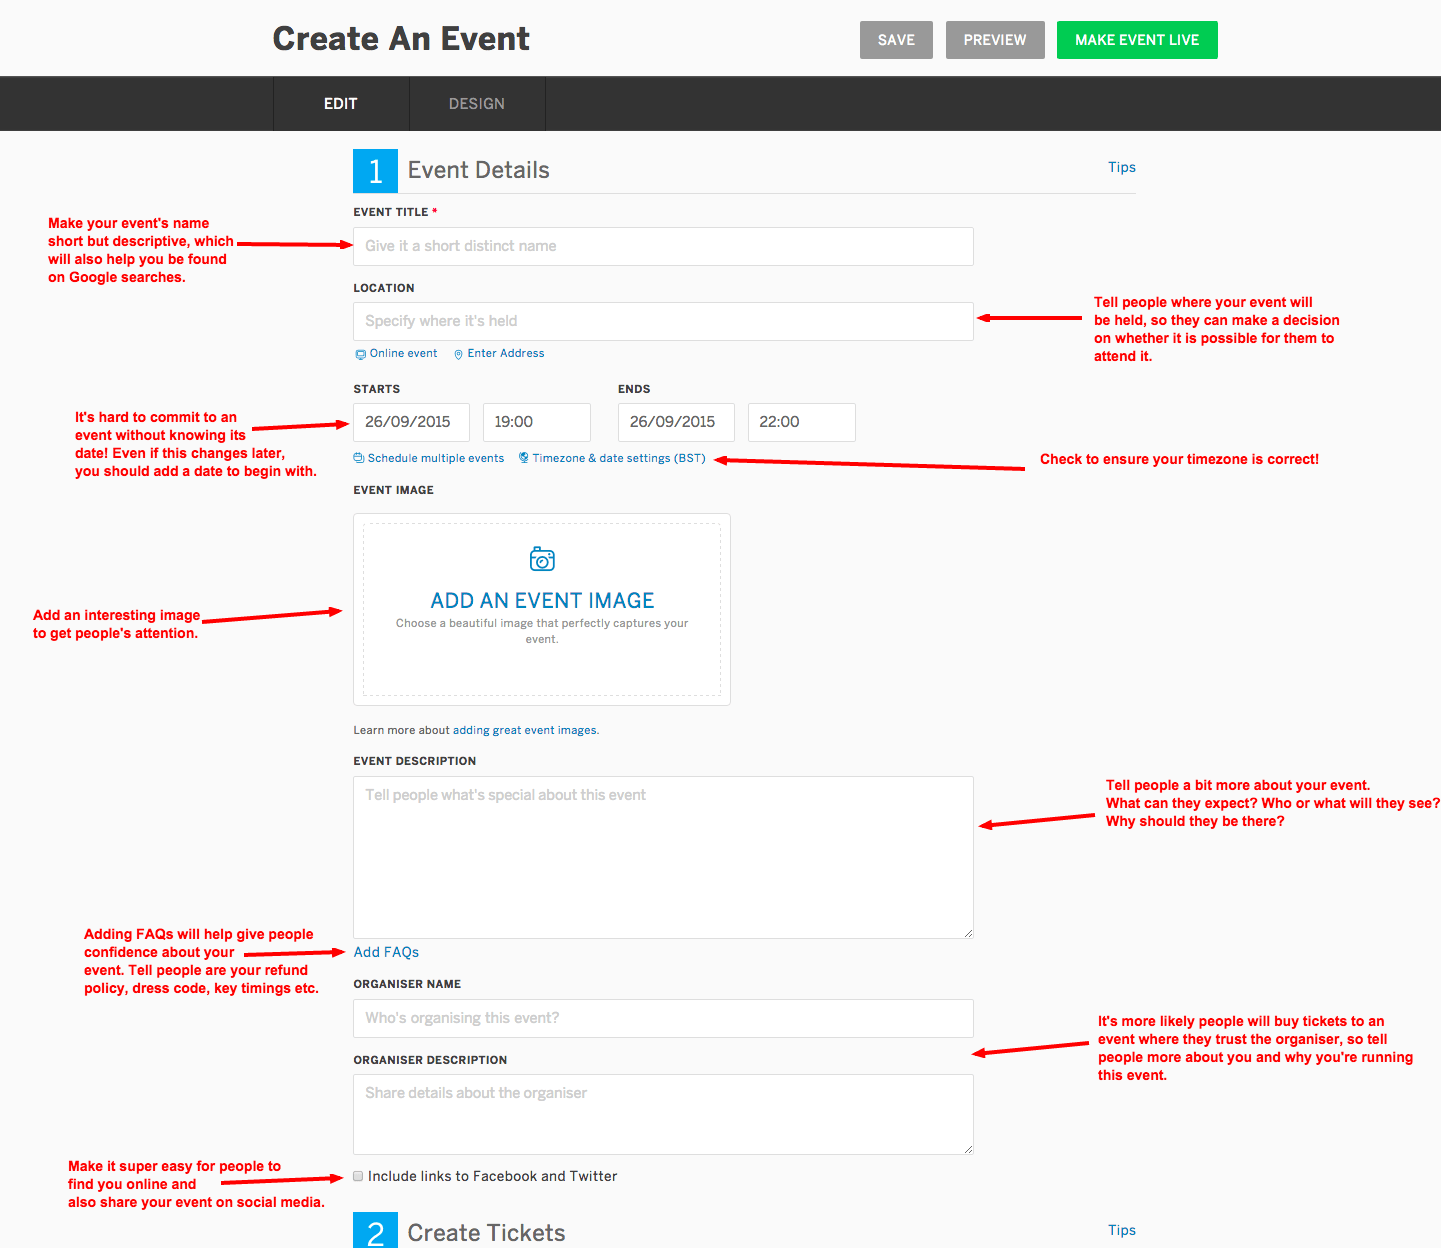
Once you’ve signed up for your account, you’ll be taken to a screen like the one below, where you can follow these simple instructions to fill out your basic event details.
(Click the image to enlarge)

Step five: Set your ticket prices
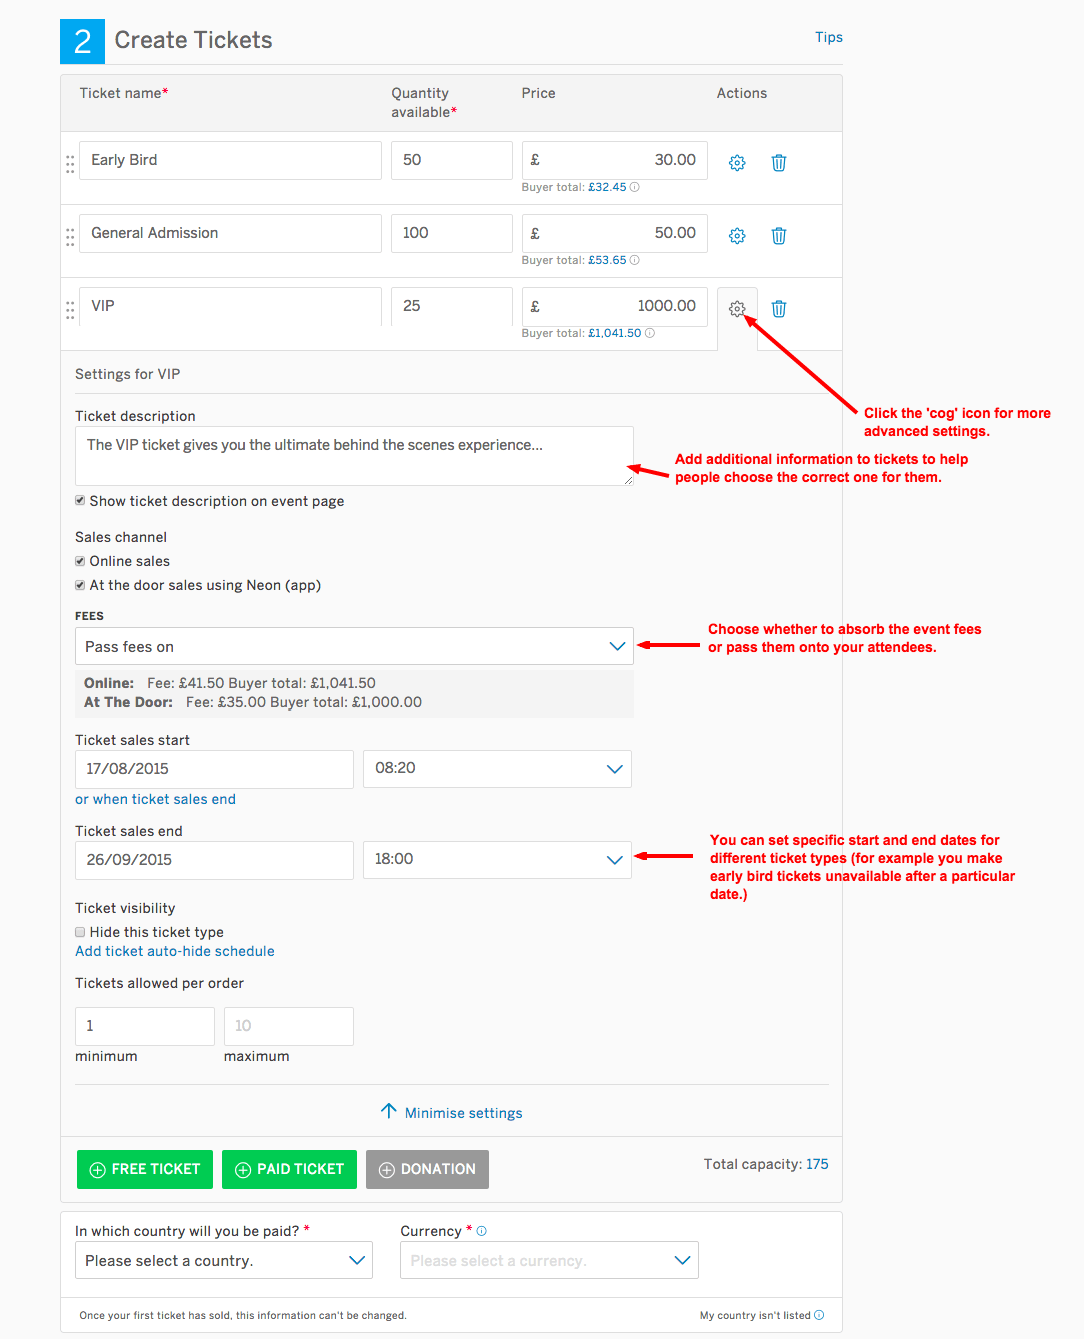
After you’ve filled out your basic event details, you need to create at least one ticket type. This could be a free ticket for free events, or you may want to charge people, in which case you can select the price, whether to absorb the Eventbrite fees or pass them onto your attendees, and when they will be available for sale.
You can also choose things like ‘reserved seating’ if you’d like to create a seating plan for your event, add ‘early bird’ tickets to help drive early sales or create ‘VIP’ tickets if you’d like to sell premium experiences to a particular target audience. Check out the image below to see all your basic options.
(Click the image to enlarge)

Step six: Customise the experience
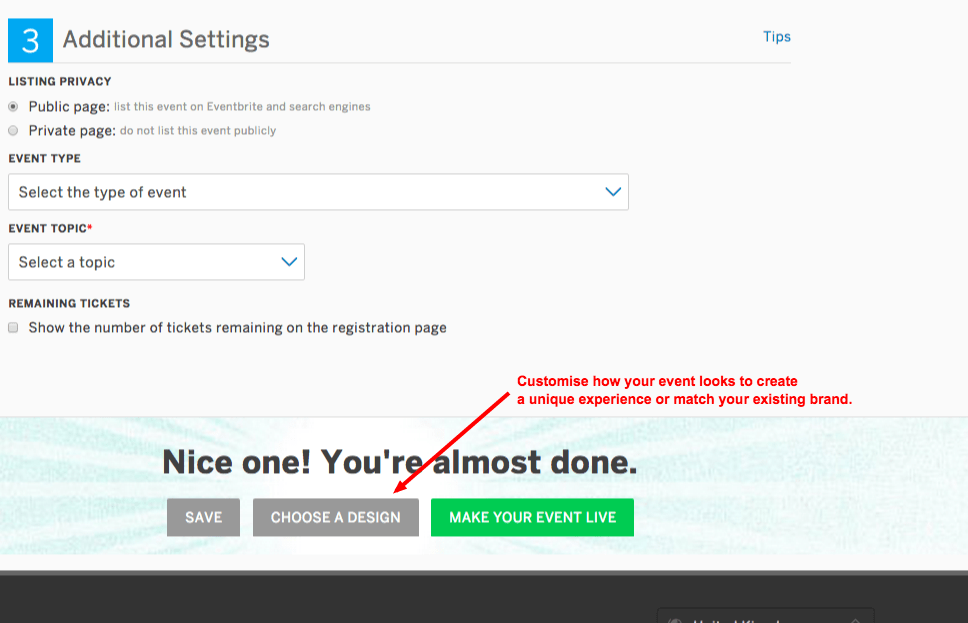
You’re almost done now, but while you can make your event live at this point, it can pay off to customise your event page a little.
Whether you just want to change the background colour of your page, or add custom headers and background images, clicking on the ‘choose a design’ button opens up a world of creative opportunities!
(Click the image to enlarge)

Not sure where to start? We’ve picked a few customised event pages to inspire you; and here’s how to create your own custom event banner for free in just a few minutes.
Step seven: Choose a payment method
When you click the ‘make event live’ button, you’ll be taken to the screen below, and you can give yourself a little mental high five, but don’t stop just yet!
(Click the image to enlarge)

Now you need to tell Eventbrite how (and where) you want to get paid! Just click on the link to choose your payment option.
Step eight: Promote your event
At this point you’ve already setup online registration for your event, but you shouldn’t stop here, as you need to tell the world about it!
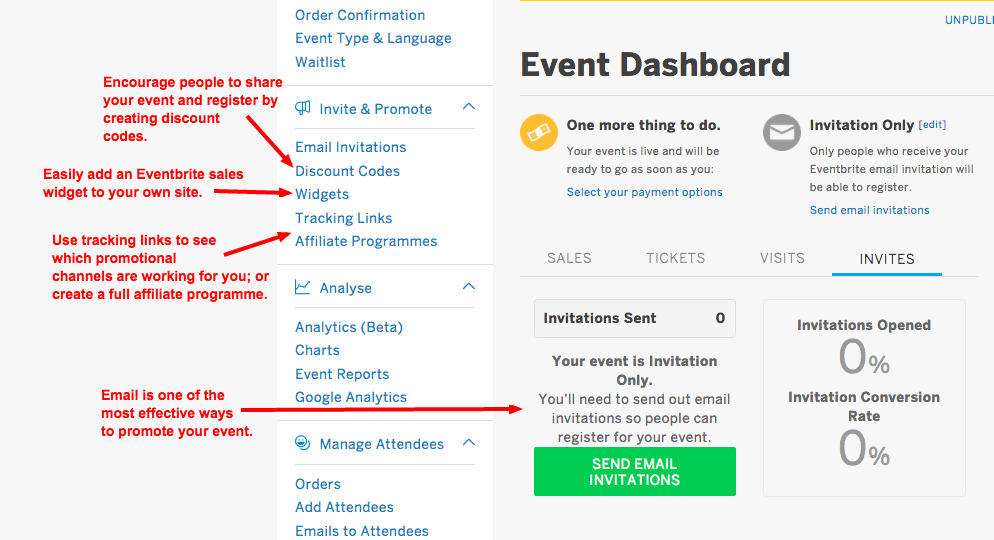
Thankfully, Eventbrite has a whole suite of integrated tools that make this easy to do (see them below).
(Click the image to enlarge)

If you’re quite new to social media or digital marketing, then we also have a host of handy advice here on the blog too. Check out a few of these posts to get started promoting your event now that it’s live and online!
- Event Marketing Strategy: Timeline, Template and Tactics
- Absolute Beginner’s Guide to Setting Up Your Social Media
- Top 10 Ways To Market Your Event For Free
- 5 Free Event Marketing Tactics You Can Do This Week
- 102 Great Event Marketing Tools
Summary
As you can see, getting your event online takes just a few minutes and then you’re ready to make those first ticket sales!
As you get more comfortable and confident, you can spend a little more time customising your event’s settings and playing with the many features Eventbrite offers you.
If you have any trouble at all with setting up your event, we also have a 24/7 support team you can reach by phone and email, so you can be confident we’re always there to help!
Why wait? Set up your online event registration today!


