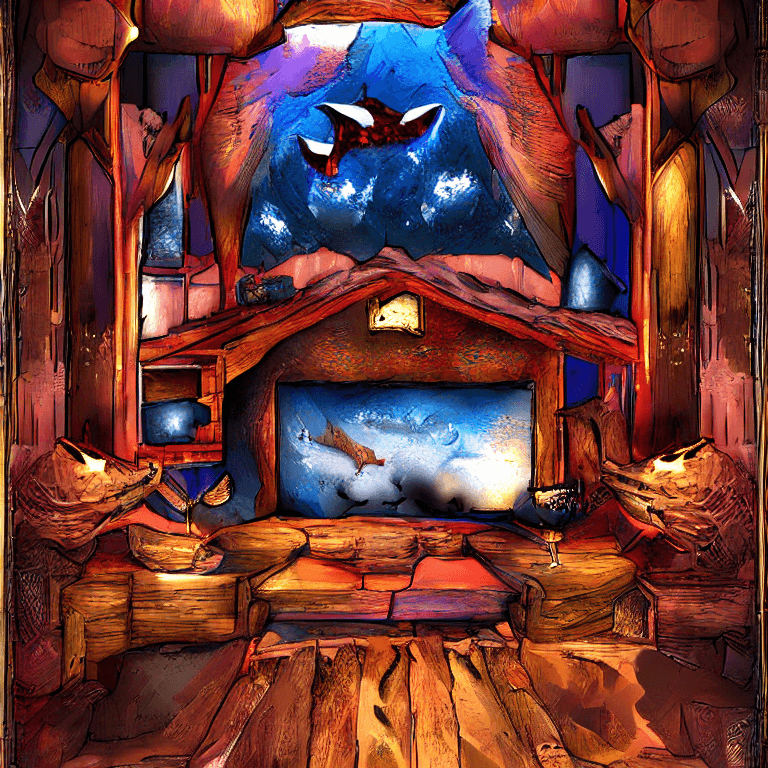
DALL-E Homebrew
In this post, we’ll look at getting setup with running your own A.I. image generator. You need a Linux system with a CUDA enabled card to get this working through to the end. I did get the basic txt-2img script working in Windows. Unfortunately, for the July released retrieval-augmented diffusion models, you need scann in order to index the openimages dataset, which is only available on Linux. WSL worked fine for me.
|
dog lion - rdm model
|
dog lion - rdm model
|
dog lion - rdm model
|
dog lion - rdm model
|
|---|
Here’s roughly what I gather you’ll need:
- Linux (WSL fine)
- 11.3 CUDA graphics
-
= 32GB RAM
- 50GB disk space (~30GB without openimages)
- 3xxx series card (I am just guessing here. This is all being done with a 3090 FE)
Latent-Diffusion
I randomly stumbled upon the latent-diffusion repo while I was browsing AI subreddits. A few posts mentioned it and I didn’t know what it was so I went googling.
I am not a computer scientist, mathematician, or any of the things that would be required to really understand what’s going on here. The paper about the new RAD models are understandable and interesting, but I haven’t done much research yet beyond that.
image-20220807154208076
Text-to-image vs. RAD
There are 2 image generation techniques possible with Latent Diffusion. We will install and take a look at both.
I believe the txt2-img model that we’ll setup first is what we are used to with other image generation tools online – it makes a super low res image clip thinks is a good prompt match and denoises and upscales it.
The RAD model uses a configurable database of images as a reference AND does the diffusion like we are used to. This seems to mean it’s less good as a general purpose generator, but could be used with a specific training set you could feasibly create. I will try this in the future.
RAD also generates 768X768 images which is pretty impressive.
|
giant cantaloupe at the beach
|
Giant cantaloupe at the beach
|
|---|
Install Instructions
Text-to-Image
-
Make sure you have CUDA 11.3 installed and
condaworks in your shell. You can get Conda here -
(Re)install Pytorch now, lest ye end up in dependency hell later. I did this via
pipbut conda may work too. -
Clone the repo to a drive with a lot of free space
-
cdinto the repo and run:conda env create -f environment.yaml conda activate ldmThis will setup the initial environment. If you get errors with Pytorch later and need to reinstall it, come back to environment.yaml and reinstall using the correct package versions.
-
Download the model and you’re all ready to go so long as your torch dependencies are all setup correct.
mkdir -p models/ldm/text2img-large/
wget -O models/ldm/text2img-large/model.ckpt https://ommer-lab.com/files/latent-diffusion/nitro/txt2img-f8-large/model.ckpt
You should be able to sample images now using:
python scripts/txt2img.py --prompt "my cool image"
Make sure to see the options you’re able to set in the README.
You can use this bash script to make running everything from a shell easier. You can include this in your ~/.bashrc file and reopen your shell. Make sure to change the 3 paths to suit your needs. We’ll look at PLMS later.
function txt2img() {
  if [ $# -eq 0 ]; then
    echo "Usage: diffuse '[prompt]' [--plms]"
    exit 1
  fi
  cd /mnt/c/diffusion/latent-diffusion;
  conda activate ldm;
  if [ $2 = '--plms' ]; then
    python scripts/txt2img.py --prompt $1 --outdir '/mnt/g/My Drive/AI Image Tests/text2img' --plms --n_iter 4 --ddim_eta 0.0
  else
    python scripts/txt2img.py --prompt $1 --outdir '/mnt/g/My Drive/AI Image Tests/text2img' --n_iter 4 --ddim_eta 0.0
  fi
}
The images are 512X512 by default. You can use This Jupiter Notebook to upscale the images with pretty good results.
Troubleshooting
- If you get CUDA memory errors running commands, try decreasing the batch size. Use
htopto troubleshoot/view memory usage. - If using WSL, make sure all your RAM is available to linux.
- If you get torch related errors, you probably need to reinstall Pytorch. This will likely cause other issues with packages. Check environment.yaml and manually install the correct package versions with
pipand/orconda(I did both and am not sure which made everything work)
|
image-20220807155754576
|
image-20220807155807229
|
|---|
RDM
You can read more about RDM here. As said before, it essentially combines a database of images with Clip descriptions with the existing diffusion process, from what I understand. This part takes a lot longer to get running.
Note, this model, especially when using the openimages training is best at recreating real things and doesn’t seem very good (yet) and creating the weird images we’re used to from the diffusion models.
-
Get the Text-to-Image model working first
-
Install new packages and download training model.
pip install transformers==4.19.2 scann kornia==0.6.4 torchmetrics==0.6.0 pip install git+https://github.com/arogozhnikov/einops.git mkdir -p models/rdm/rdm768x768/ wget -O models/rdm/rdm768x768/model.ckpt https://ommer-lab.com/files/rdm/model.ckpt -
Test everything is working so far with
python scripts/knn2img.py --prompt "I'm a computer" -
If everything went well, you should see a success text in your shell. Now we need to download all the image indexes/models. The openimages zip is 11GB. The ArtBench data is pretty small.
mkdir -p data/rdm/retrieval_databases
wget -O data/rdm/retrieval_databases/artbench.zip https://ommer-lab.com/files/rdm/artbench_databases.zip
wget -O data/rdm/retrieval_databases/openimages.zip https://ommer-lab.com/files/rdm/openimages_database.zip
unzip data/rdm/retrieval_databases/artbench.zip -d data/rdm/retrieval_databases/
unzip data/rdm/retrieval_databases/openimages.zip -d data/rdm/retrieval_databases/

mkdir -p data/rdm/searchers
wget -O data/rdm/searchers/artbench.zip https://ommer-lab.com/files/rdm/artbench_searchers.zip
unzip data/rdm/searchers/artbench.zip -d data/rdm/searchers
We’re ready to use the Artbench models now (which work pretty well in my limited testing), but what we really want is to use the massive openimages model as our reference. We downloaded the data, but we need to create the index.
If you want to test the Artbench database, run
python scripts/knn2img.py --prompt "A blue pig" --use_neighbors --knn 20
|
image-20220807155912575
|
image-20220807155927854
|
|---|
Openimages Index
Unless you have a super computer, the terrible memory management in python multiprocessing (from what I can tell) will stop us from using the 4 files we unzipped with the script from the repo to index them. Everything else I tried, the processes would run out of memory.
Luckily, we just need to concatenate the files. You can delete the old part files after if you would like. We also need to move the part files out of the openimages folder.
cd data/rdm/retrieval_databases/openimages/
cat 2000000x768_part1.npz 2000000x768_part2.npz 2000000x768_part3.npz 2000000x768_part4.npz > 2000000x768.npz
mv 2000000x768_* ~/temp
cd ../../../../
Now when we run the training script, we shouldn’t run out of memory. I think this is some issue in their multi file function in the training script.
python scripts/train_searcher.py
-
We need to change the batch size in
scripts/knn2img.pyso we don’t run out of GPU memory. You may need to lower to 1, but I was able to set to 2 on a 3090. -
Open
scripts/knn2img.pyin an editor -
Go to line 243 or find “n_samples”
-
Change the default value to 1 or 2 and save
-
You can also do this using the command line parameter, but since it will never work for me, I wanted to change the default value. Note if you update the repo in the future this will likely get overwritten.
Now we can generate RDM images using the openimages database:
python scripts/knn2img.py --prompt "A blue pig" --database openimages --use_neighbors --knn 20
Here is a ~/.bashrc script to run it conveniently. Again, make sure to change the 3 paths to suit your needs:
function diffuse() {
    if [ $# -eq 0 ]; then
       echo "Usage: diffuse '[prompt]' [--plms]"
       exit 1
    fi
    cd /mnt/c/diffusion/latent-diffusion;
    conda activate ldm;
    if [ $2 = '--plms' ]; then
        python scripts/knn2img.py  --database openimages --prompt $1 --use_neighbors --outdir '/mnt/g/My Drive/AI Image Tests/RDM' --knn 20 --plms
    else
        python scripts/knn2img.py  --database openimages --prompt $1 --use_neighbors --outdir '/mnt/g/My Drive/AI Image Tests/RDM' --knn 20
    fi
}
Speeding Things Up
You can also run prompts in batches by creating a file (in this case prompts.txt) and pointing the script to it with the –from-file parameter like this
python scripts/knn2img.py --database openimages --from-file ./prompts.txt --use_neighbors --outdir '/mnt/g/My Drive/AI Image Tests/RDM' --knn 20
sample prompts.txt
prompt 1
prompt 2
prompt 3
This should save a lot of time if you’re running a lot of queries since the model only gets loaded once. The text-to-image model does not have this option.
|
sports car in the desert
|
sports car in the desert
|
sports car in the desert
|
|---|
Initial Testing, & PLMS
Below are some inital results from both the models with PLMS on and off. PLMS should make things run faster. For now, we won’t measure the speed increase but will look subjectively at image quality/results.
Since the RDM model will only make 2 photos at a time for my system, I included both photos instead of a grid for that model.
I will almost certainly do more specific testing in the future and these models will be included in future comparison posts.
A wood house on a hill, landscape photography
Text-to-image
| without plms | with plms |
|---|---|
|
image-20220807150052836
|
image-20220807153545252
|
RDM
| without plms | with plms |
|---|---|
|
image-20220807145854952
|
image-20220807145920778
|
|
image-20220807145911367
|
image-20220807145931866
|
A purple stop sign
Text-to-image
| without plms | with plms |
|---|---|
|
image-20220807154729984
|
image-20220807153711466
|
RDM
| without plms | with plms |
|---|---|
|
image-20220807150500598
|
image-20220807153000850
|
|
image-20220807151421393
|
image-20220807153013778
|
fox den, digital art
Text-to-image
| without plms | with plms |
|---|---|
|
image-20220807155228088
|
image-20220807155634227
|
RDM
| without plms | with plms |
|---|---|
|
image-20220807151441359
|
image-20220807152859265
|
|
image-20220807152235267
|
image-20220807152911615
|
winning the big game, award winning photography
Text-to-image
| without plms | with plms |
|---|---|
|
image-20220807160007336
|
image-20220807160228471
|
RDM
| without plms | with plms |
|---|---|
|
image-20220807151456027
|
image-20220807152928304
|
|
image-20220807152216729
|
image-20220807152940229
|
a sports car driving in sand dunes
Text-to-image
| without plms | with plms |
|---|---|
|
image-20220807160557241
|
image-20220807160838768
|
RDM
| without plms | with plms |
|---|---|
|
image-20220807151401781
|
image-20220807152825508
|
|
image-20220807152200386
|
image-20220807152839511
|
An Image Generator to Call Your Own
And there you have it – no more credits or monthly limits, just pure AI image generation all your own. Once I figure out some tuning settings and create my own image training database, we’ll likely talk about this again.
Hopefully with some tuning and new releases/models this will get closer to the WOW factor DALL-E has.
#artificialintelligence #ai #machinelearning #technology #datascience #python #deeplearning #programming #tech #robotics #innovation #bigdata #coding #iot #computerscience #data #dataanalytics #business #engineering #robot #datascientist #art #software #automation #analytics #ml #pythonprogramming #programmer #digitaltransformation #developer


